German scientists found that the average household refrigerator has about 11.4 million bacteria per square centimeter. If the ingredients stored in the refrigerator are stored for an extended period of time, it is easy to breed various bacteria, such as Salmonella, Listeria, Yersinia, etc.
If you eat food from a dirty fridge, you will have symptoms such as headache, abdominal pain, diarrhea and vomiting, acute gastroenteritis, pneumonia, etc., which is what people call “refrigerator disease”.
But where do you even begin? If the idea of cleaning out your fridge stresses you out, have no fear! We’re here to help with our step-by-step guide on how to spring clean your fridge.
Here are two things you need to keep in mind:
- cleaned it regularly
- store the food scientifically
So, How to Clean Your Fridge?
Here are the steps to follow:
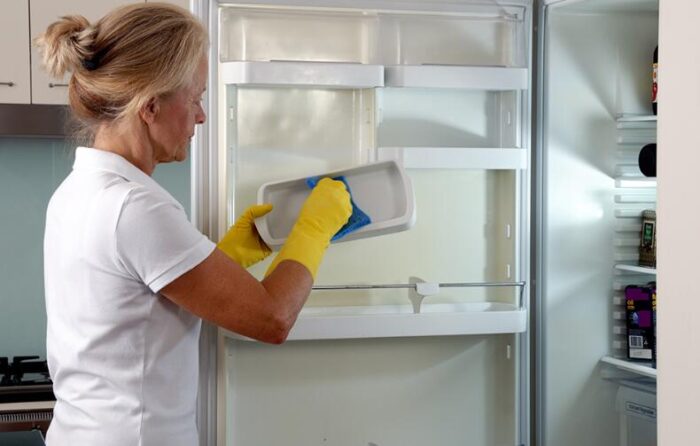
Step One: Take Everything Out
The first step is to take everything out of your fridge—yes, everything.
Don’t be afraid to pack up your food in coolers and make a trip to the grocery store while you clean.
It’s better to be safe than sorry when it comes to food safety. And if you’re thinking that emptying out your fridge sounds like a lot of work, just think of all the effort you’ll save in the long run by not having to scrub around all those obstacles.
This will give you a chance to really assess what needs to stay and what needs to go. Plus, it’s always easier to clean when there’s nothing in the way!
Once everything is out, give your shelves a good wipe down with a sponge or cloth.
Step Two: Check the Expiration Dates
Now that everything is out of the fridge, it’s time to do a little purge.
Start by checking the expiration dates on all of your food and condiments. If something has expired, or is close to expiring, toss it in the garbage.
This is also a good opportunity to donate any non-perishable items that you know you won’t use but are still within their expiration date.
Just make sure to check the donation guidelines at your local food bank first!
Step Three: Clean the Drawers and Shelves
Cleaning out your drawers and shelves doesn’t have to be a daunting task. In fact, it can be quite therapeutic. Here are a few easy steps to get you started:
Here are some helpful tips for cleaning out your fridge:
1. First, remove all of the food from the shelves and drawers. This will give you a chance to clean each surface thoroughly.
2. Next, use a mild soap and water solution to clean all of the shelves and drawers. Be sure to rinse away any soap residue before returning the food.
3. Once the shelves and drawers are clean, you can put the food back in. Be sure to check expiration dates and throw away any expired items.
4. Finally, take a look at your fridge door. If there are any fingerprints or smudges, simply wipe them away with a damp cloth.
By following these simple steps, you can ensure that your fridge is clean and organized – and that your food will stay fresh for longer!
Step Four: Put Everything Back in Its Place
Once everything is clean and dry, it’s time for the fun part—putting everything back! Start by putting all of your food items back in their rightful place.
Then move on to storing things like condiments, jams, and jellies in an organized way that makes sense for you. Some people like to store these items alphabetically, while others prefer grouping them by type (e.g., all of the salad dressings together).
And don’t forget to put all of your loose items, like Tupperware lids and plastic bags, back in their rightful place too. A little organization can go a long way in making your fridge look and feel brand new!
Do whatever feels right for you! Just make sure everything has a designated spot so that you can easily find what you need when you need it.
Well, How to Store Your Food in Fridge Scientifically?
By following a few simple tips, you can make sure that your food stays fresh and tasty for as long as possible. So put on your lab coat and let’s get started!
1.The Temperature Matters
When it comes to storing your food in the fridge, temperature is everything.
Most experts recommend setting your fridge to between 32°F and 40°F—any colder, and your food will start to freeze; any warmer, and it will start to spoil.
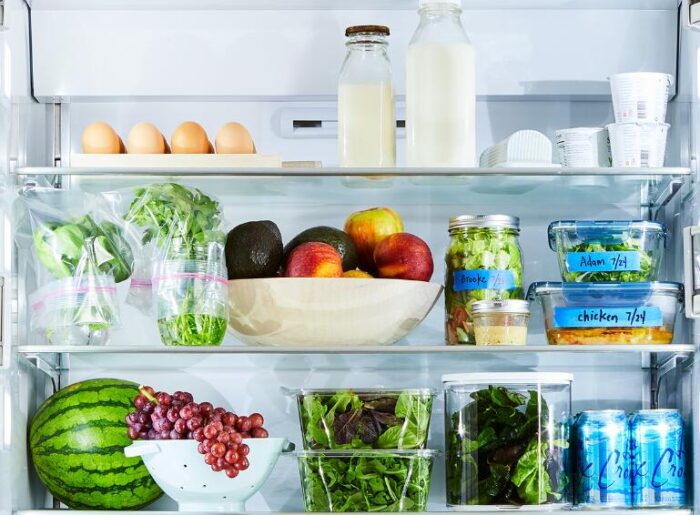
But where in the fridge should you store your food to keep it at the optimal temperature? Here are a few general guidelines:
The Top Shelf: This is where you’ll want to store most of your dairy products, as well as any cooked leftovers that you plan on eating within the next few days.
The Bottom Shelf: This is the coldest part of the fridge, so it’s ideal for storing raw meat, fish, and poultry. If you’re not planning on eating them within the next day or two, be sure to wrap them tightly in freezer paper or plastic wrap first.
The Door: The door is actually the warmest part of the fridge, so it’s not ideal for storing perishable items. That being said, it’s perfect for keeping condiments, jams, and jellies—just be sure to check the expiration date before you use them.
2.Use Air-Tight Containers
Another important factor to consider when storing your food in the fridge is air circulation.
You want to make sure that your food is stored in air-tight containers so that it doesn’t dry out or spoil prematurely.
Some good options for air-tight storage include Mason jars, Tupperware containers, and Ziploc bags. Just be sure to label them with the date so you know how long they’ve been in the fridge!
3.Know When to Throw It Out
Of course, no matter how carefully you store your food, there will come a time when it just isn’t safe to eat anymore.
Unfortunately, there’s no easy way to tell when that time has come—but there are a few general guidelines you can follow.
For example, most cooked leftovers will last for three to four days in the fridge; raw meat will last for one to two days; and hard cheese can last up to six weeks (but softer cheeses like mozzarella should be eaten within a week).
When in doubt, trust your nose—if something smells off, chances are it is! And whatever you do, don’t taste it to find out—that’s just asking for trouble.
More useful tips:
1. Put all the food in airtight containers, so they don’t dry out or spoil quickly.
2. Write the expiration dates on everything, so you know when to use it up.
3. Store leftovers in the fridge within 2 hours of cooking, and eat them within 3-4 days.
4. Keep the fridge at 40°F or below, and the freezer at 0°F.
5. Label everything with the name and date, so you know what it is and how long it’s been in there.
6. Organize your fridge so you can find what you need quickly and easily.
Conclusion:
A clean fridge not only looks great but can also help keep your food fresh and prevent germ build-up. Spring cleaning your fridge may seem like a daunting task, but we promise it’s not as bad as it seems! Just follow our simple four-step guide and you’ll have a clean fridge in no time.