You might think your old T-shirt is headed straight for the trash, but there’s still hope! With just a few simple steps you can turn it into a nifty mop tool.
It won’t take long to cut and tie the shirt into handy strings that are perfect for cleaning up any kind of a mess.
In no time, you could be proud of your very own frugally-created mop that can get the job done without spending too much money.
Who knew something so simple and old could be used in such a practical way?
What Types of Shirt Can Be Turned Into A Good Mop?
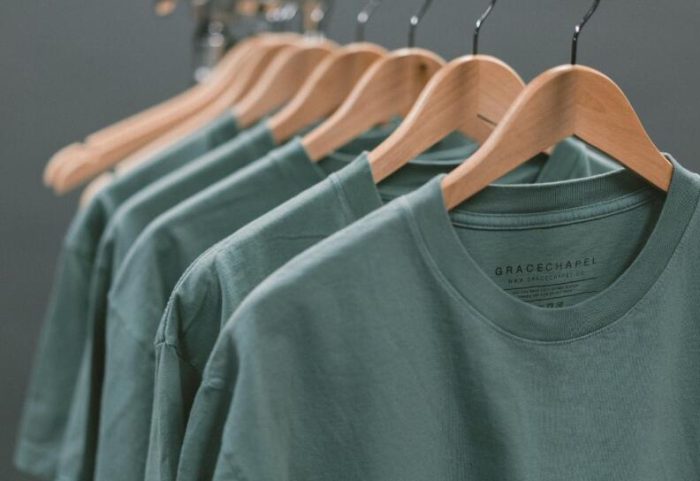
Any clean, cotton T-Shirt can be turned into a mop. Cotton is the most absorbent fabric, so it will make your mop more effective at picking up dirt and grime.
Avoid using shirts that are too thin or have visible holes, as these may weaken the effectiveness of your mop and cause it to tear easily.
Additionally, make sure that the shirt is free of any stains or dirt before cutting and assembling it into a mop.
Guides on DIY Mop Strings – Cutting the T-shirt
To begin, you will need to find an old cotton T-Shirt that is still in good condition.
Preferably one that does not have any holes or tears in the fabric, as these can weaken the mop’s effectiveness.
Step 1:
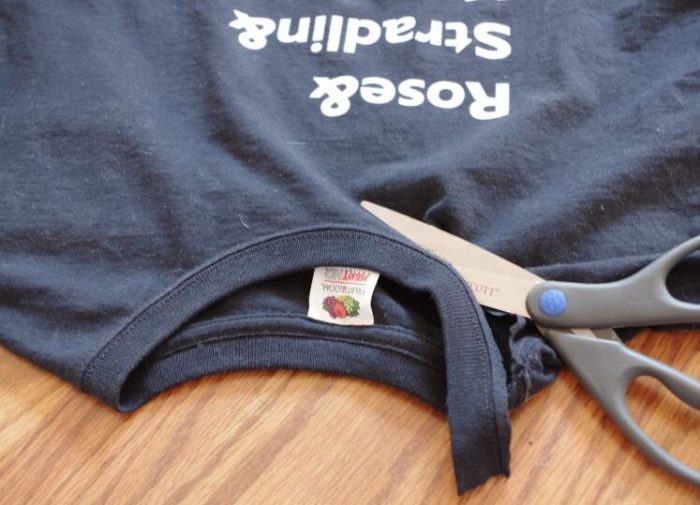
Cut the collars, sleeves, and sides of the T-shirt off. This will leave you with a rectangle shape from the remaining material.
Step 2:
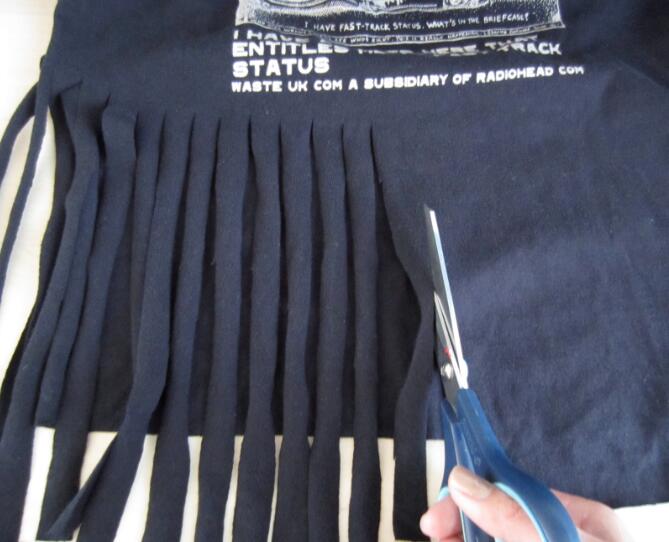
Start by cutting the old T-shirt into strips of fabric about 2-3 inches wide.
To ensure a more effective mop, make sure that the strips are as even as possible and that they are long enough to reach the floor.
Step 3:
Once you have cut all of your strips, tie them together in a knot at one end.
Then, take another strip and tie it around the bunch of fabric strips about 1/3 of the way down from the top. This will help create an effective mop head.
Step 4:
You can then take the remaining strips of fabric, and tie them to the opposite end of the mop head to create a handle. Make sure to secure the knots tightly so that it does not unravel or come undone during use.
Step 5:
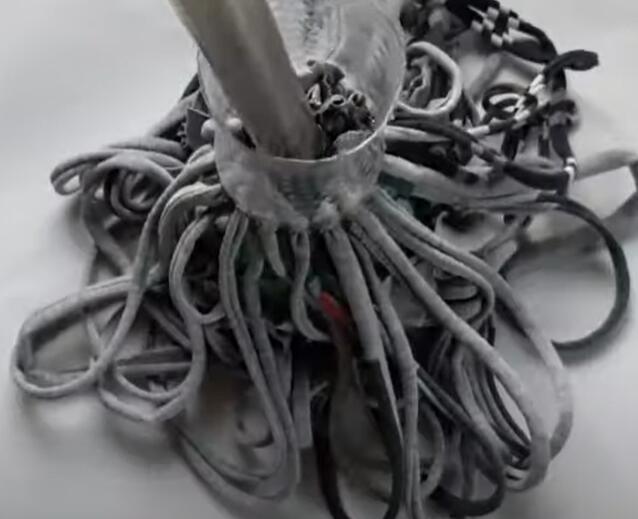
Next, gather all the loops together in one hand and begin tying them onto a metal pole or handle.
Step 6:
To ensure maximum effectiveness from your new mop, make sure to give it a good soak in warm, soapy water before using it.
This will help to loosen any dirt and grime from the fabric, as well as get rid of any excess lint. Give it a good wring-out before use, then you’re all set for a successful cleaning job!
Notes:
You should also remember to clean your mop after each use, so that it can continue to serve you well. By emptying the dirty water and hanging up your mop to dry, you will ensure its longevity and effectiveness over time.
With just a few simple steps, you have turned an old T-Shirt into a useful mop tool! Your frugal creativity has paid
How to Make a Mop Stick?
You can make mops of different sizes, lengths, and thicknesses according to your needs.
The mop cloths are easy to replace and you can add or subtract them as you please, changing colors as you like.
The materials are a 1.5L yogurt bucket, 2.5 cm diameter plastic pipes (leftover material from the renovation pipes), screws, nuts, eye rings and an old T-shirt.
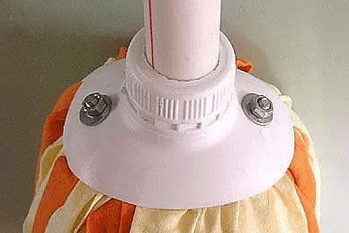
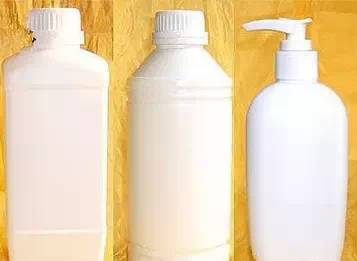
In addition to the yogurt buckets, plastic bottles such as shampoo bottles and detergent bottles can also be used as long as there is a suitable mop pole (plastic pipe, wood stick, etc.) that can pass through the bottle opening.
Conclusion
By following the tips above, you can easily turn your old t-shirt into a useful mop. The best part is that once you’ve got the hang of it, you can experiment with different types of fabrics and create your own design!
With just a few materials, you can make yourself a durable, efficient cleaning tool that will last for years to come. So, go grab that old t-shirt and get to work!