Tiles are the preferred flooring options due to their various designs, low maintenance requirements, relative durability, and cleaning ease. However, due to overuse, old age, or plain bad luck, they tend to chip, break, or become loose. So how should we fix tile floors?
Here are fix tips for 6 different types of damage to tiles. Keep reading if you are interested.
How to Repair Tile Floors?
Though applicable, these options tend to be expensive, and you cannot move out whenever the tiles in your home are ruined. Therefore, you may need to get down and do some DIY tile repairing from time to time.
If so, then here are a few steps on how to proceed with the repair:
1. Small chips
Small chips are the most frequent types of tile damage you will find and are usually caused by objects dropping on the tiled floor.
You will deal with them in both cases in the below manner though tiled floors with more chips will take longer to repair.
- Requirements
- 220-grit sandpaper
- Tile touch up glaze matching your tile flooring color
- A plastic or metallic straight razor blade
- Wooden toothpicks, Small bowl, Warm water
- Cleaning detergent, Mop
- Colored paint if the glaze color differs from your tile color
Step 1: Thoroughly shake the tile glaze you bought, then dab quantity into your mixing bowl using the applicator brush.
Step 2: Return the applicator brush into the bottle and tightly close it to prevent the glaze from drying up.
Step 3: If your glaze and tile color differ, add small amounts of the colored paint into the mix, confirming on an appropriate surface if the color meets your requirements.
Step 4: After attaining the correct color, note the ratios to minimize time wastage while remixing a new batch.
Step 5: Depending on the chip’s size, use either a toothpick or a brush to scoop and apply the paste in the chip, ensuring you overfill each. Do not worry if it is not level.
Step 6: Let the mix dry for a day.
Step 7: Once dry, use the sharp blade to scrape off the excess paste by sliding it horizontally across the floor to obtain a uniform cut.
Step 8: Use the 220-grit sandpaper to smooth down the finish if it impresses you; however, if you are not satisfied for any reason, remix and repeat the procedure.
2. Large chips/ holes
Sometimes you may find yourself staring at a large chip that more or less resembles a hole. In such a scenario, Bbsides what showed to you in this video, you can also follow these steps:
Use warm soapy water to mop the entire floor surface, ensuring all the dirt in the hole is cleaned out, then let the floor completely dry before you begin your work.
Step 1: Using an artist’s brush paint, all sides of the hole using a thin layer of tile primer allow it to dry.
Step 2: Using an oil-based paint that matches the color of your tiles, paint over the primer to the tiles’ edge, then let it dry. If need be, paint a second coat of paint.
Step 3: In a disposable bowl, mix two parts of marine epoxy. This epoxy will create a rigid waterproof surface once it dries.
Step 4: Using a toothpick or an artist’s brush, fill the hole with your epoxy to the tile level and let it dry for 24 hours.
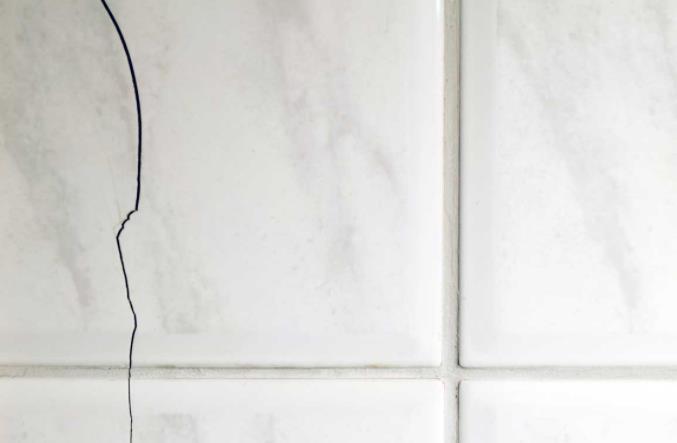
3. Cracked tiles
Whether it is during installation, when a heavy object falls on your tile, or normal tile wear and tear, cracks do form on tiles.
Failure to deal with these cracks could end up in your tiles becoming loose. To prevent the worsening of cracks that will ultimately prove costly, you should repair the tile.
Step 1: Obtain an appropriate epoxy kit.
When fixing your tiles, never use the 1-part epoxy kit as it offers you a lower quality than the 2-part epoxy.
Step 2: Use paper towels damped using rubbing alcohol to clean your surfaces, then let them dry completely.
Step 3: Mix two tablespoons of the 2-parts epoxy in a disposable dish.
Step 4: Use a toothpick or a Popsicle stick, smear a generous amount of the paste along the crack, ensuring you cover about half a centimeter on either side of the crack. Ensure you work quickly as the epoxy dries quickly.
Step 5: Let the paste dry for about fifteen minutes.
You can also lightly touch the epoxy’s surface to ensure it is completely dried but never touch it while it is still wet.
Step 6: Once dry, use the sharp blade to scrape off the excess paste by sliding it horizontally across the floor to obtain a uniform cut.
Step 7: If the color contrasts your tile surface color, use an epoxy dye to create a color you desire, then follow the manufacturer’s instructions and apply it over the epoxy.
If you cannot find epoxy, then apply a thin layer of wood glue over the crack and leave it to dry for about ten minutes.
If you cannot find any of the earlier options, snatch a similar colored nail polish, follow the earlier process, and then let it dry. Once dry, remove the excess using nail polish remover.
4. Broken tile
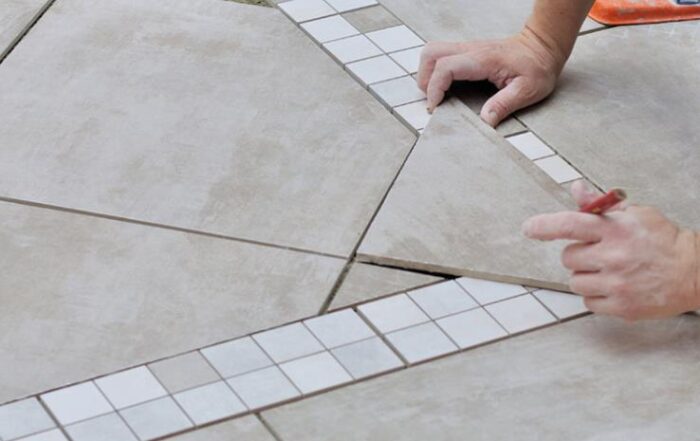
If your tile impact was significant enough, you will get more than a chip or crack on your tile. The tile will break.
A broken tile is severe, especially if you have young children in your house, as the sharp edges of broken tiles can seriously injure them.
Though some people usually apply adhesive and stick the broken parts back in place, this is a temporary solution and results in a very uneven finish that will break easily. Therefore, if you have a broken tile, you should replace the tile as below:
- Requirements
- Power drill
- Similar colored and sized tile
- Chisel, Motor, Hammer
- Putty knife, Replacement Process
Step 1: Holding a power drill vertically over the broken tile, squeeze the trigger, and drill a couple of holes into the tile to weaken it.
Ensure you drill the holes either vertically or horizontally across the tile’s center in a straight line.
Step 2: Putting the chisel’s blade along the line of holes and gently tap on its butt using a hammer to break the tiles.
Tilt the chisel to 45 degrees and continue to remove the entire broken tile from the floor.
Once removed, carefully dispose of the broken pieces to prevent harm.
Step 3: Holding the chisel at an acute angle, slide it over the surface the tile has been dislodged from to remove the mortar or grout used to adhere the tile to the floor. Once done, carefully dispose of it to prevent harm.
Step 4: With a pair of latex gloves on, scoop a dollop of the motor using the putty knife and carefully apply it across the tile’s bottom side, ensuring you attain a thickness of about 1/8 inches. Be careful not to smear the motor on the other tiles as it will be troublesome to remove.
Step 5: Center the tile on the surface you are to place it, then gently press it into place. Be gentle to avoid squeezing the motor up the sides of the tile.
Step 6: Smear a small amount of similar colored grout on the grout float and run it across the newly laid tile’s surface. Continue doing so till all the gaps around the tile are filled.
Step 7: Before the grout sets, use a damp piece of cloth to wipe off the excess, then let the grout dry overnight.
5. Outdated/worn out tiles
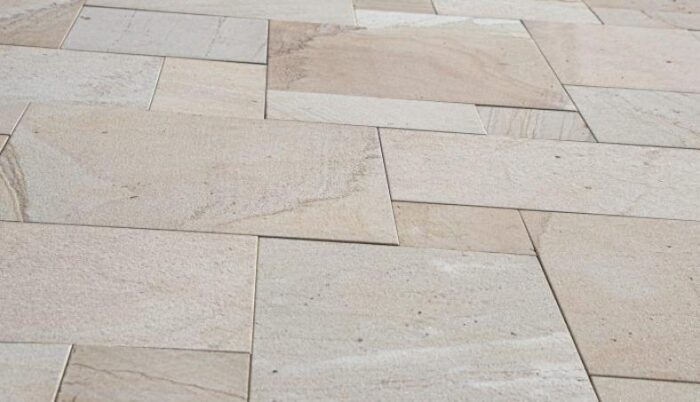
Outdated tiles tend to be stylistically dated and pose serious problems when it comes to remodeling. They are also often chipped or cracked.
However, in place of removing the entire flooring, you can employ several tactics to save on the cost as below:
- Installing the vinyl top
Adding a vinyl surface to your outdated tiles will give you a cheap and quick fix. Vinyl comes in numerous designs and qualities, allowing you to choose from your preferred options.
However, you should know that once applied; this topping is permanent. Moreover, if the surface has considerable traffic, vinyl will not be a suitable option as it punctures easily.
- Covering the tiles using a rug
Using a rag is doubtlessly the most cost-effective method you can use to deal with outdated tiles. Buy a beautiful rug and spread it over the tiles. However, this only hides the flaws but does not solve the issue.
- Resurfacing without replacement
To better tackle the issue, you need to update the flooring by merely resurfacing without tile replacement.
Resurfacing will give your tile a waterproof layer and chemically resistant surfacing that comes in whatever design you adore. Moreover, you can use this technique, both outdoor and indoors.
However, for such an undertaking, you will fare off better by contacting a professional.
6. Loose tile
Tiles installed in your house customarily become loose due to several factors such as:
- Inappropriate bonding
- Settling of the house
- Temperature changes
- Moisture
- Surface difference
- Heavy loads
To repair a loosened tile without replacing it:
Step 1: Drill a hole in the grout near the loose tile. Ensure it is deep enough to allow the adhesive to reach underneath the tile.
Step 2: Place the epoxy or adhesive sprout through the drilled hole and gently squeeze some of it into the hole.
Step 3: Let the adhesive/epoxy work its way under the tile. Squeeze in more until it stops flowing under the tile.
Step 4: Place a heavy object over the tile to remove air bubbles and allow the tile to adhere to the floor properly.
Step 5: Clean the area using a damp piece of cloth.
Step 6: Let the adhesive settle for 24 hours, then remove the object.
Step 7: Place new grout into the holes you drilled.
Step 8: Clean the floor, and that’s that.
The proper mop will save your efforts. Here are more mop choices for your tile floors:
7. Stained/crumbling/cracked grout
Once you notice that your grout is damaged, you will need to repair it quickly to avoid incurring the cost of entirely replacing them. To do so, you need to:
Step 1: Loosen the damaged and cracked grout by dragging a bamboo skewer over the grout line, then sweep it off.
Following the manufacturer’s instructions, mix a new batch in a small bowl.
Step 2: Using a grout float, evenly smear the new grout over the grout lines, then scrape off the excess using the grout float’s edge.
Step 3: Let the grout dry for about five minutes, then use a damp piece of cloth to clean the dirt off the tile surface.
- If you find your tiles are seriously damaged, you might opt to replace them entirely. In such a scenario, you will:
Step 1: Pry the tiles using a chisel placed at an angle to the tile’s edge, then, using a hammer, hit the chisel’s butt to dislodge the tiles, then dump them off.
You can also use a sled hammer to hit each tile and break them into smaller pieces.
Step 2: Utilizing a stripper, soak the floor in the solution, then use an abrasive scouring pad to remove the debris and glue from the floor.
After cleaning, inspect the floor for any defects and fix them before proceeding.
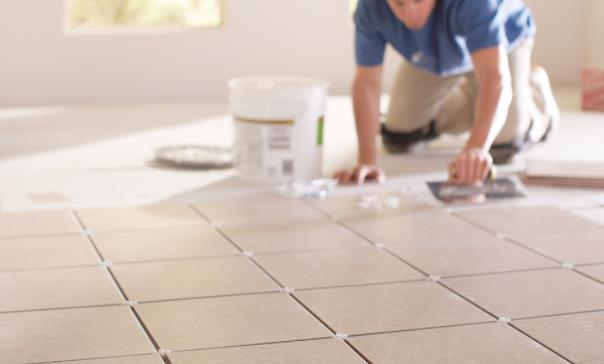
Step 3: Using a tape measure, obtain the room’s dimensions and multiply them to obtain the square footage. Utilizing the square footage of your desired tile, divide the two measurements to get the required number of tiles.
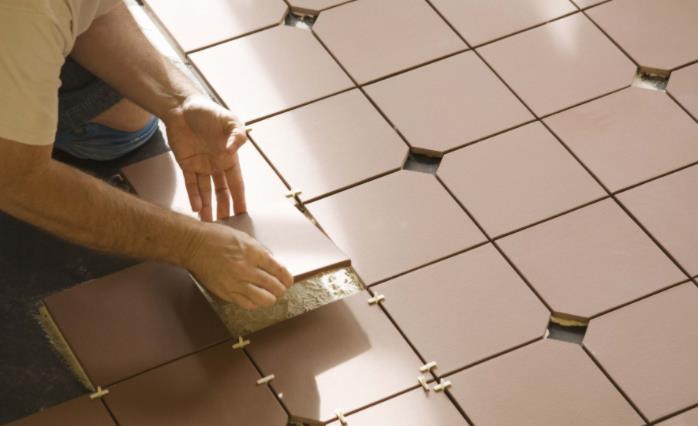
Step 4: After purchasing the required tiles, use your trowel to apply a thin-set on the floor. Ensure you move in the same direction throughout to prevent the formation of air bubbles.
Step 5: Place each tile gently starting from one corner. Be careful while doing this step as the thin dries quickly.
If some sections need smaller tile pieces, use a tile cutter.
Step 6: After placing all the tiles, mix your grout according to the manufacturer’s instructions, then, using a grout float and trowel, press the grout into the grout space.
Step 7: Using a dump piece of cloth, wipe off the excess grout and let the tiles set in.
Conclusion
Tiles have become an integral part of our homes and, as such, need to be cared for. If you notice any damage to them, as illustrated in the article, ensure you follow the laid out processes to avoid further damage that will incur you more cost.
However, if you find it challenging to apply the said procedures alone, contact a professional to help repair your floor tiling.