Are you tired of stepping into a cluttered mess as soon as you enter your home? Do you often find yourself frantically searching for your keys or other essentials? It’s time to create a drop zone!
A drop zone is a designated area in your home where you can conveniently store and organize everyday items, ensuring a clutter-free and stress-free entryway. In this step-by-step guide, we will walk you through the process of creating a drop zone that is both practical and stylish, tailored to your specific needs.
By implementing our guidelines and incorporating some creativity, you’ll transform your entryway into an organized haven that welcomes you home. Let’s get started!
Planning Your Drop Zone
Before diving into creating your drop zone, it’s important to plan it out strategically. Here’s what you need to consider:
Choosing the right location for your drop zone
The first step is to assess different areas in your home to find the perfect spot for your drop zone. Look for high-traffic areas near the entryway, such as a hallway, foyer, or mudroom. You want a location that is easily accessible to everyone in the household.
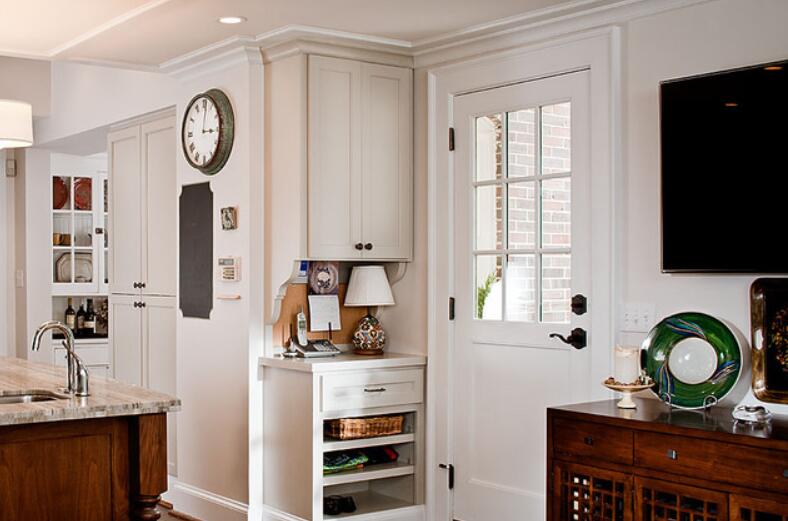
Example: If your front door opens directly into your living room, you could designate a small corner near the entrance as your drop zone. Alternatively, if you have a separate mudroom, that could serve as an ideal space for your drop zone.
To choose the right location, ask yourself the following questions:
- Is the area easily accessible from the main entrance?
- Is there enough space to accommodate the storage solutions you plan to incorporate?
- Will the drop zone disrupt the flow of traffic in the entryway?
Determining the size and layout of your drop zone
Next, evaluate the available space and determine the size and layout that will work best for your drop zone. Take into account the number of people in your household and the amount of items you need to store.
Example: If you have a compact space, consider utilizing vertical storage solutions like wall-mounted hooks and shelves. If you have a larger area, you could incorporate a bench for comfort and convenience.
To determine the size and layout, follow these steps:
- Measure the available space: Use a measuring tape to determine the dimensions of the area you have selected for your drop zone. This will help you choose appropriately sized storage solutions.
- Create a rough layout: Consider the different elements you want to incorporate in your drop zone, such as hooks, shelves, and seating. Sketch a rough layout to visualize how these elements will fit into the space.
- Think about accessibility: Ensure that the layout allows easy access to the storage solutions. For example, hooks should be within reach for hanging coats and bags, and shelves should be easily accessible for storing shoes and accessories.
Now that you have a plan in place, let’s move on to the essential elements you’ll need to create an efficient drop zone.
Essential Elements of a Drop Zone
To create an effective drop zone, you’ll need to incorporate essential elements that provide both storage and organization. Here are the key components to consider:
Storage solutions
Hooks and racks: Install sturdy hooks or racks on the wall to hang coats, jackets, and bags. This will prevent them from cluttering other areas of your home.
Example: Opt for hooks of various sizes and heights to accommodate different items. Assign specific hooks to each family member, making it easier for everyone to find their belongings.
Tip: Consider using decorative hooks or ones with labels to add a charming touch and improve organization.
Shelves or cubbies: Incorporate shelves or cubbies to provide designated spots for shoes, accessories, and other items. Keep them neatly organized to maintain a clutter-free environment.
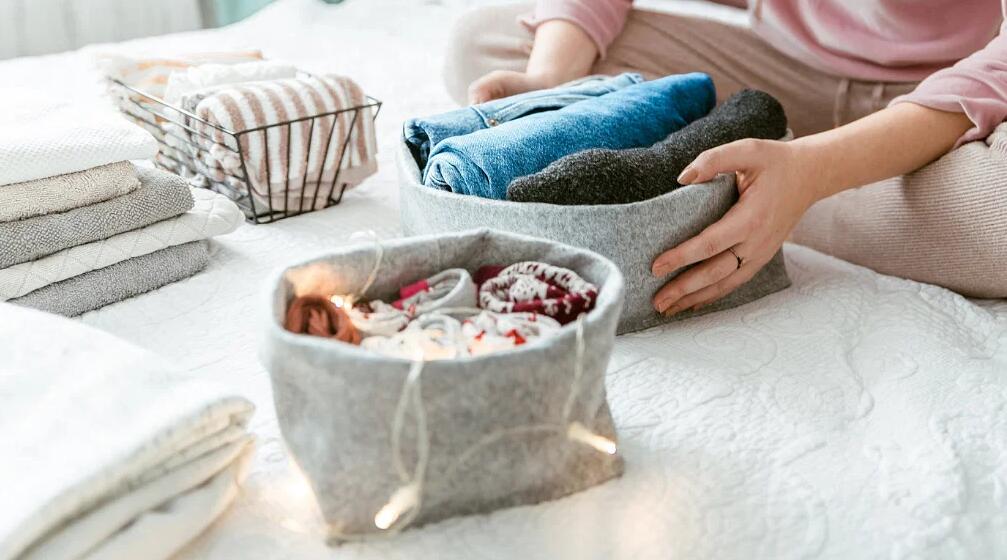
Example: Utilize baskets or storage containers within the cubbies to further categorize and store smaller items like gloves, hats, and scarves.
Tip: Reserve the bottom cubbies for shoes, using a labeled tray or mat to keep them organized and prevent dirt from spreading.
Organization tools
Containers or baskets: Use containers or baskets to hold smaller items such as keys, wallets, and sunglasses. Place them on a shelf or in a designated section to keep everything easily accessible.
Example: Label each container to ensure that everyone knows where to find and return their personal items.
Tip: Consider using clear bins or transparent containers to quickly identify the contents without the need to open them.
Mail and document organizers: To manage incoming mail and important documents, incorporate a wall-mounted organizer with compartments or folders. This will help you keep track of bills, letters, and other essential paperwork.
Example: Sort the compartments or folders based on different categories, such as “to be filed,” “to be addressed,” and “urgent.”
Tip: Take a few moments each day to declutter your mail organizer, discarding unnecessary documents and filing away important ones.
Seating or bench
Including seating in your drop zone provides a convenient spot to sit and put on or take off shoes. It also adds a welcoming touch to the area.
Example: Choose a bench with built-in storage, allowing you to store items like extra blankets, umbrellas, or seasonal accessories.
Tip: Consider adding cushions or pillows to the seating to make it more comfortable and visually appealing.
Now that you have a clear understanding of the essential elements, it’s time to dive into the next steps: decluttering and sorting your belongings.
Decluttering and Sorting
Before organizing your drop zone, it’s crucial to declutter and sort through your belongings. Follow these steps to streamline your entryway and create a more functional drop zone:
1. Assess and categorize
Begin by taking a look at all the items currently cluttering your entryway. Separate them into categories such as coats, bags, shoes, accessories, and miscellaneous items. This will help you get a better understanding of what you have and what needs to be stored in your drop zone.
2. Keep, donate, discard
Next, go through each category and decide what you want to keep, what can be donated or given away, and what needs to be discarded. Be honest with yourself and let go of items that are no longer functional or bring you joy.
Example: Consider donating coats or accessories that you no longer wear or that have been outgrown. Discard any items that are damaged or beyond repair.
3. Maximize storage space
Now that you have narrowed down your belongings, assess the available storage solutions in your drop zone, such as hooks, shelves, and containers. Strategically allocate space to each category, keeping in mind the frequency of use and accessibility.
Example: Place hooks at a height suitable for hanging coats and bags, while ensuring that shelves or bins for shoes are easily reachable.
4. Label and organize
To maintain a well-organized drop zone, label storage containers, baskets, and shelves. This will ensure that everyone in the household knows where to find and return items.
Example: Use clear labels or adhesive tags for easy identification. You can also use color-coded labels to assign specific storage areas for each family member.
By decluttering and sorting your belongings, you’ll create a streamlined drop zone that makes it easier to find what you need and maintain an organized entryway.
Now that your drop zone is organized, let’s explore some additional tips to enhance its functionality and style.
Enhancing Functionality and Style
Now that you have set up an organized and efficient drop zone, it’s time to add some final touches to enhance its functionality and style. Consider the following tips:
1. Lighting
Ensure that your drop zone has adequate lighting, especially if it’s located in a dimly lit area. Install a bright overhead light or add wall sconces to improve visibility.
Example: If you want to create a cozy ambiance, consider using warm, diffused lighting fixtures or adding a small table lamp on a nearby shelf or console table.
2. Mirror
Incorporate a mirror into your drop zone’s design. A mirror serves both practical and decorative purposes, allowing you to quickly check your appearance before leaving the house.
Example: Choose a mirror with a stylish frame that complements the overall aesthetic of your entryway. Consider placing it at eye level for convenience.
3. Personalization
Add personal touches to your drop zone to make it unique and reflective of your family’s personality. Display artwork, photographs, or decorative items that bring joy and create a welcoming atmosphere.
Example: Hang family photos in attractive frames or include motivational quotes to inspire positivity as you come and go.
4. Incorporate a charging station
To keep devices organized and ready for use, consider adding a charging station to your drop zone. This way, you can conveniently charge your phones, tablets, or other electronic devices as you enter or leave the house.
Example: Use a charging dock or charging station with built-in cable management to keep cords neatly organized and prevent clutter.
5. Seasonal adjustments
As the seasons change, adapt your drop zone to accommodate seasonal items. Swap out coats and accessories to match the current weather and store off-season items in labeled containers or a separate storage area.
Example: During colder months, include bins for gloves, scarves, and hats, while in warmer months, make room for sunscreen, hats, and sunglasses.
By incorporating these enhancements, your drop zone will not only be functional but also visually appealing, creating a welcoming entrance to your home.
Congratulations on creating an organized and stylish drop zone! Enjoy the benefits of a clutter-free entryway.
Conclusion
In conclusion, a well-designed drop zone is essential for maintaining an organized and functional entryway in your home. By incorporating storage solutions, organization tools, and comfortable seating, you can create a space that efficiently houses belongings while adding a welcoming touch.
Through the process of decluttering and sorting, you can streamline your drop zone and ensure that only the necessary items are stored within it. Finally, by enhancing functionality and style with proper lighting, a mirror, personalization, a charging station, and seasonal adjustments, your drop zone becomes a practical and aesthetically pleasing area.
Embrace the benefits of a clutter-free entryway, where you can easily grab what you need and leave your home feeling organized and stress-free.